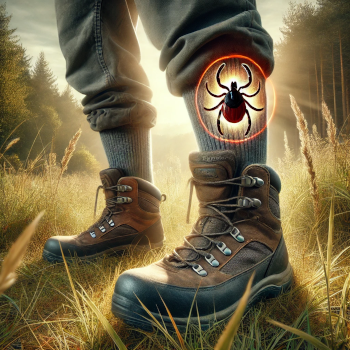
When enjoying the great outdoors, encountering a tick is an unfortunate but common experience. These tiny pests can latch onto your skin, and if not removed properly, they can transmit a host of dangerous diseases. Knowing how to safely remove a tick is crucial for your health and well-being. In this guide, we’ll walk you through the best practices for tick removal, and why it’s important to take immediate action.
Why Quick and Safe Tick Removal is Essential
Ticks can carry diseases like Lyme disease, Anaplasmosis, and Rocky Mountain Spotted Fever. The longer a tick remains attached, the greater the risk of transmission. Removing a tick promptly and correctly can significantly reduce the likelihood of getting sick.
Step-by-Step Guide to Safely Remove a Tick
1. Gather Your Tools
- Fine-tipped Tweezers: The most effective tool for tick removal. Avoid using your fingers, as squeezing the tick can increase the risk of infection.
- Rubbing Alcohol: For cleaning the area before and after tick removal.
- Gloves: Optional but recommended to avoid direct contact with the tick.
- Resealable Bag: For storing the tick in case testing is needed.
2. Clean the Area
- Before removing the tick, clean the area around the bite with rubbing alcohol. This helps minimize the risk of infection.
3. Grasp the Tick Correctly
- Use fine-tipped tweezers to grasp the tick as close to the skin’s surface as possible. The goal is to grab the tick’s head, not its body, to avoid squeezing infectious fluids into your skin.
4. Pull Straight Up with Steady Pressure
- Gently but firmly pull the tick upward without twisting or jerking. Twisting can cause the tick’s mouthparts to break off and remain in the skin. If the mouthparts do break off, try to remove them with the tweezers.
5. Clean the Area Again
- After the tick is removed, clean the bite area thoroughly with rubbing alcohol or soap and water. This step helps prevent any potential infection.
6. Dispose of the Tick Properly
- Place the tick in a resealable bag. You may want to send it for testing, especially if you live in an area where tick-borne diseases are common. This can provide peace of mind or alert you to any potential risks.
7. Monitor for Symptoms
- After removing the tick, keep an eye on the bite area for signs of a rash, or symptoms such as fever, chills, or aches. If any unusual symptoms develop, contact your healthcare provider immediately.
Common Mistakes to Avoid
- Don’t Use Folk Remedies: Methods like burning the tick with a match or covering it with nail polish are not only ineffective but can increase the risk of infection.
- Don’t Squeeze the Tick: Squeezing the tick’s body can push harmful bacteria into your bloodstream.
- Don’t Delay Removal: The sooner you remove the tick, the lower your risk of contracting a tick-borne disease.
What to Do After Removing a Tick
- Save the Tick for Testing: If you’re concerned about the tick’s potential to carry disease, place it in a resealable bag and store it in the freezer. You can send it to a lab for testing to determine if it carries any harmful pathogens.
- Consult a Doctor: If you notice any symptoms such as a rash, fever, or joint pain within a few weeks of the tick bite, consult a healthcare provider. Mention the tick bite and provide any details about the tick’s appearance and how long it was attached.
- Prevent Future Bites: To avoid future tick encounters, wear protective clothing, use tick repellents like Permethrin on clothing, and perform regular tick checks after spending time outdoors.
Why Prevention is Key
Removing a tick safely is crucial, but preventing tick bites in the first place is even better. Regular use of tick repellents, proper clothing, and tick checks can drastically reduce your chances of a tick bite.
Ready to learn more about staying safe in the great outdoors? Join our Survival Picks Newsletter for expert advice, must-know survival skills, and the latest tips to keep you and your family safe during your outdoor adventures.